- Set Up Blender:
- Open Blender and start with a new project.
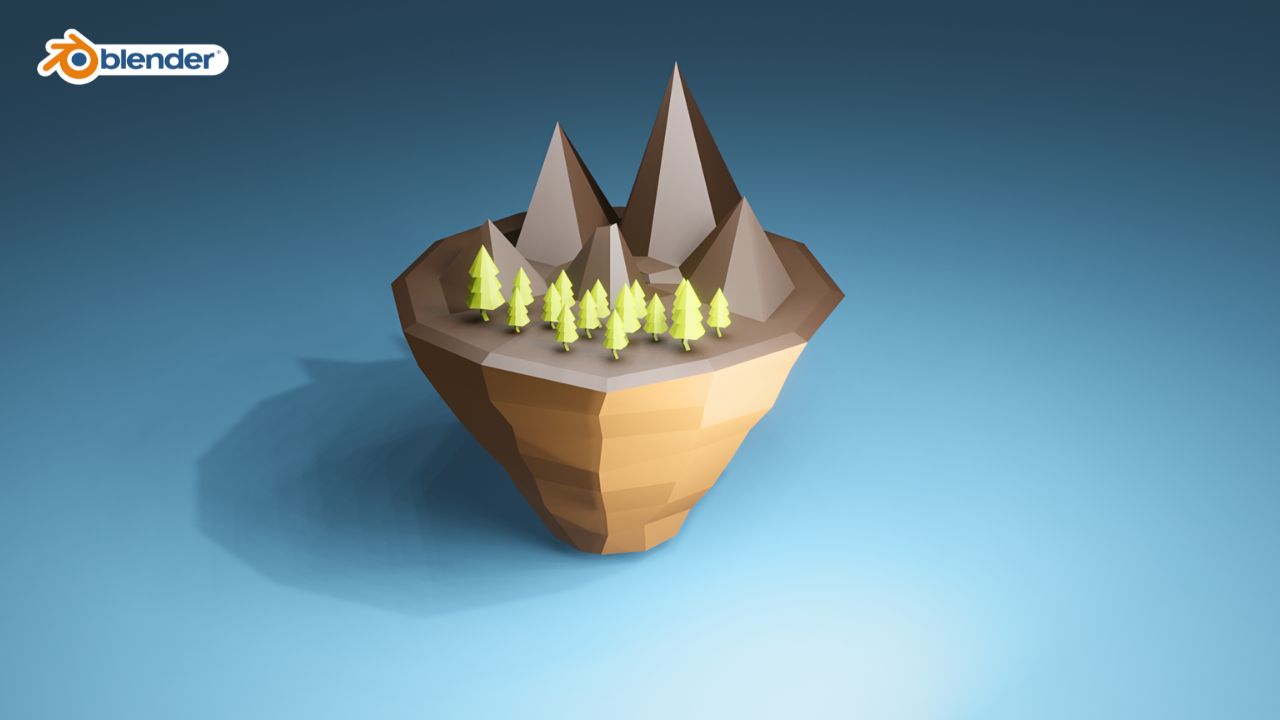
- Create the Base Mesh:
- Add a plane (Shift + A > Mesh > Plane) to serve as the base of your island.
- Enter Edit Mode (Tab) and subdivide the plane (Right-click > Subdivide) several times to create more vertices for sculpting.
- Use sculpting tools (found in the toolbar on the left or by pressing Shift + Space) to sculpt the basic shape of your island. You can use brushes like Grab, Inflate, Flatten, and Smooth to shape the terrain.
- Add Detail to the Terrain:
- Continue sculpting to add detail to the terrain, such as cliffs, hills, and valleys. Refer to references or images of landscapes for inspiration.
- Use the Sculpt Mode brush settings to adjust the strength, radius, and falloff of your brushes for more control.
- Create the Floating Effect:
- Select the base mesh of your island.
- Add a Displace modifier (Properties panel > Modifier tab > Add Modifier > Displace).
- Create a new texture in the modifier settings and adjust the settings to add some randomness to the terrain, giving it a more natural look.
- Experiment with the strength and scale of the displacement to achieve the desired effect.
- Texture Painting:
- Use Blender’s Texture Painting tools to add textures to your island. You can paint directly onto the terrain with different colors and textures to make it look more realistic.
- Consider using textures for features like grass, sand, rocks, and water to enhance the visual appeal of your island.
- Add Vegetation and Objects:
- Populate your island with vegetation like trees, bushes, and grass. You can model these elements yourself or use pre-made assets from Blender’s library or external sources.
- Scatter the vegetation across the island, paying attention to natural distribution patterns.
- You can also add other objects like rocks, buildings, or other landmarks to enhance the scene.
- Set Up Lighting:
- Add lights to your scene to illuminate the island. Consider using a combination of sunlight, point lights, and area lights to achieve the desired atmosphere.
- Experiment with different light angles and intensities to create interesting shadows and highlights.
- Rendering:
- Set up your camera angle and composition to capture the island from its best angle.
- Choose a rendering engine (such as Cycles or Eevee) and adjust the render settings according to your preferences.
- Render your scene and wait for the image to process.
- Post-Processing (Optional):
- After rendering, you can further enhance your image using Blender’s compositor or external image editing software like Photoshop or GIMP.
- Add effects like depth of field, color grading, and vignetting to give your image a polished look.
- Save and Share:
- Save your Blender project file and render output.
- You can share your creation with others or use it in your personal projects.
By following these steps, you can create a stunning floating island 3D model in Blender. Experiment with different techniques and have fun with the process!
