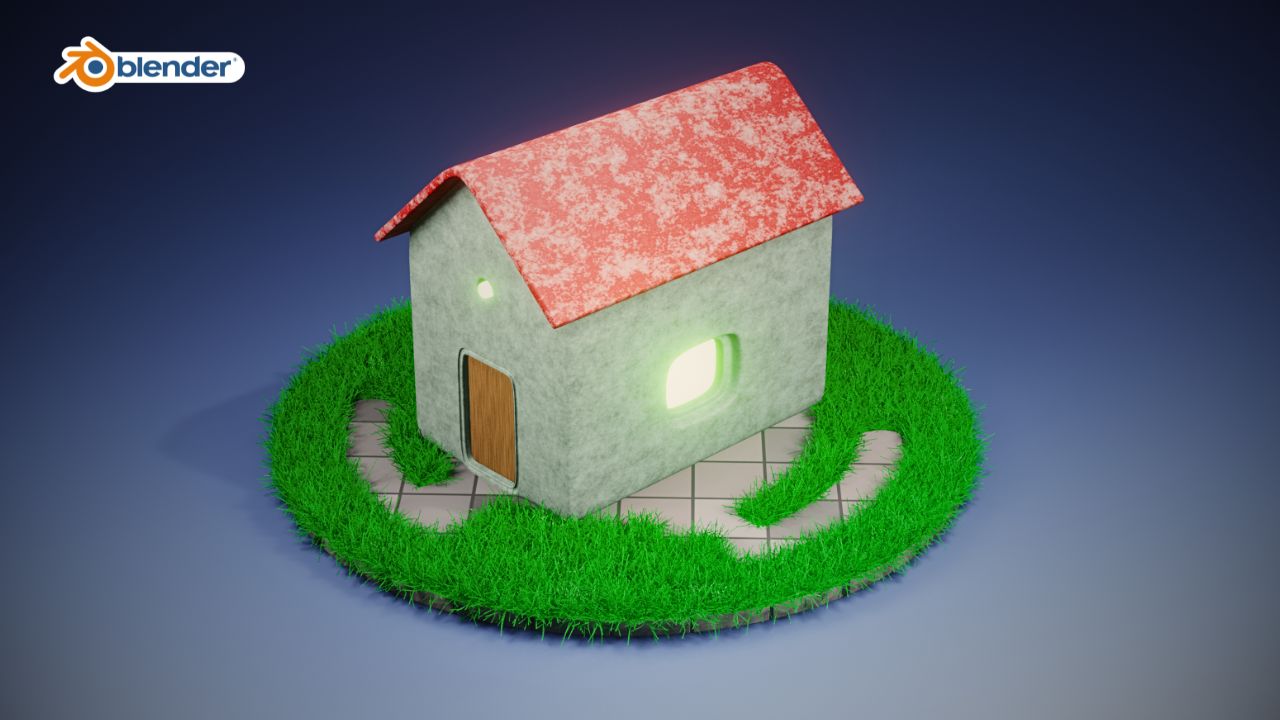
Creating a tiny 3D house in Blender involves a series of steps that combine modeling, texturing, lighting, and rendering. Here’s a general guide to get you started:
1. Conceptualization and Planning:
- Define the concept of your tiny house. Consider its architectural style, size, number of rooms, and any specific features you want to include.
- Sketch or collect reference images to guide your design.
2. Setting up Blender:
- Download and install the latest version of Blender from the official website (https://www.blender.org/download/).
- Familiarize yourself with Blender’s interface and basic navigation controls.
3. Modeling the Base Structure:
- Start with a basic shape, such as a cube, to represent the main structure of the house.
- Use Blender’s modeling tools to shape the cube into the walls and roof of your tiny house.
- Add details like doors, windows, and other architectural features.
4. Refining the Model:
- Refine your model by adjusting proportions and ensuring that details are accurately represented.
- Use additional shapes and modifiers to create more complex elements, such as stairs, furniture, or interior details.
5. Texturing:
- Apply textures to different parts of your model. You can use Blender’s built-in textures or import your own.
- UV unwrap your model to ensure textures are applied correctly.
6. Lighting:
- Set up lighting for your scene. Experiment with different types of lights (point lights, area lights, etc.) to achieve the desired atmosphere.
- Consider the time of day and how it affects the lighting.
7. Camera Setup:
- Position and configure the camera to capture the best angles of your tiny house.
- Experiment with different camera settings, such as focal length and depth of field, to enhance your render.
8. Rendering:
- Configure rendering settings in Blender, including resolution, quality, and output format.
- Render your scene to generate the final images or animations.
9. Post-Processing (Optional):
- Use Blender’s compositor or external image editing software to perform post-processing.
- Adjust colors, add effects, or make any final enhancements.
10. Save and Share:
- Save your Blender project file (.blend) in case you need to make future edits.
- Save your rendered images or animations for sharing or further use.
Tips:
- Explore online tutorials for specific techniques and tools in Blender.
- Join Blender communities to seek advice and feedback from experienced users.
- Experiment and iterate to refine your skills and improve your results.
Remember that creating a tiny 3D house in Blender is a creative process, and there are various ways to approach it. Feel free to experiment, and don’t hesitate to seek guidance from the Blender community if you encounter challenges along the way.
