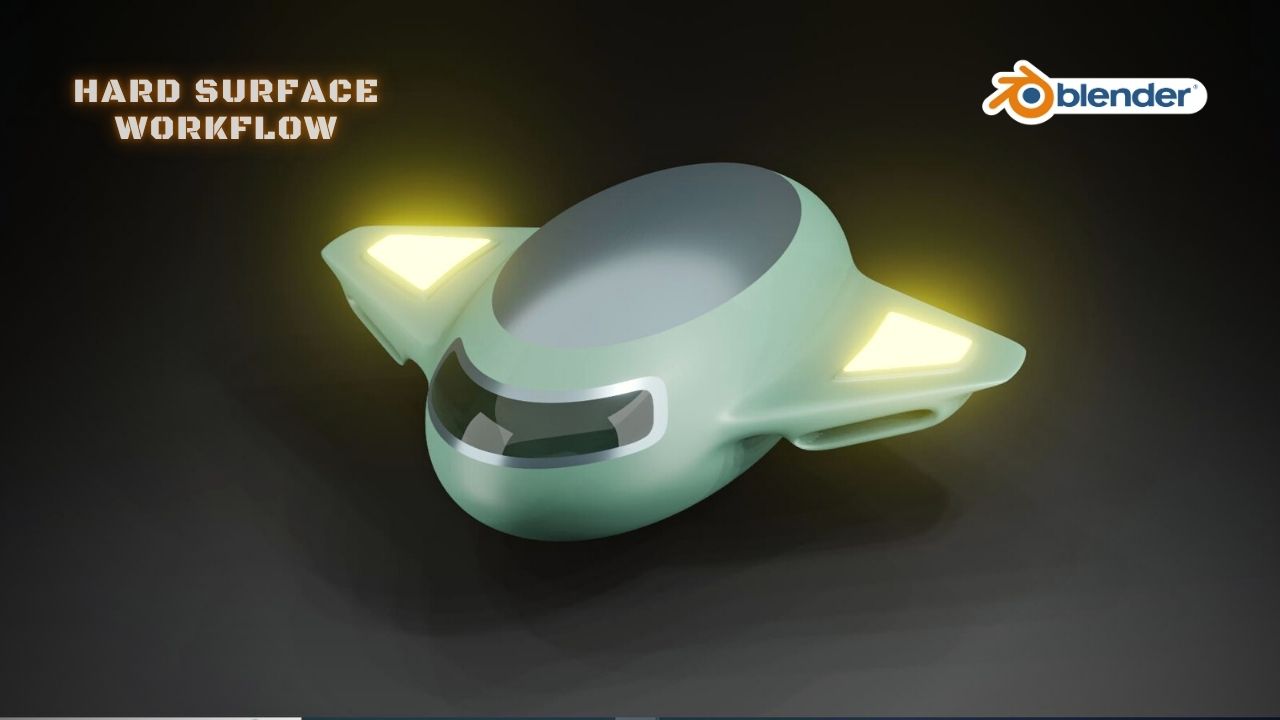
Creating a 3D spacejet vehicle in Blender can be an exciting and challenging project, allowing you to unleash your creativity and technical skills. Blender is a versatile 3D modeling and animation software that is well-suited for such endeavors. Here’s an introduction to the process of developing a 3D spacejet vehicle:
1. Conceptualization and Design:
- Start by conceptualizing your spacejet’s design. Consider its purpose, whether it’s for exploration, combat, or transport. Visualize the vehicle’s shape, size, propulsion systems, and any unique sci-fi features.
2. Reference Gathering:
- Collect reference images and materials to inspire your design. Look for sci-fi spacecraft, futuristic technology, and real-world space-related concepts. These references will provide inspiration and help you create a more realistic model.
3. Setting up Blender:
- Download and install the latest version of Blender if you haven’t already. Familiarize yourself with Blender’s interface, including the 3D viewport, properties panel, and various modeling tools.
4. Modeling:
- Begin by creating the basic shape of your spacejet using primitive objects like cubes, cylinders, and spheres. Use Blender’s modeling tools to shape and refine your model.
- Extrude, bevel, and subdivide surfaces to add details and complexity to your spacejet. Consider adding wings, engines, cockpit, landing gear, and any other components.
5. Texturing:
- Create or find appropriate textures for your spacejet. Use image textures to add color, surface details, and patterns to your model. UV unwrapping is essential for correctly mapping these textures onto your 3D object.
6. Materials and Shading:
- Assign materials to different parts of your spacejet. Blender’s Node Editor can help you create complex materials, adding properties such as metallic surfaces, reflective materials, and glass for the cockpit.
7. Lighting and Environment:
- Set up lighting in your scene to emphasize your spacejet and achieve the desired atmosphere. Experiment with different lighting sources, like distant stars, and their intensities.
- Create a space-themed environment that complements your spacejet. This can include stars, planets, or a space station in the background.
8. Animation (Optional):
- If you want your spacejet to be more than just a static model, you can animate it. Create keyframes for movement, rotation, and any other actions you want your spacejet to perform.
9. Rendering:
- Configure your rendering settings, including resolution, quality, and file format. Choose between Blender’s built-in render engine (Cycles) or real-time rendering engine (Eevee) based on your project’s needs.
10. Post-Processing (Optional):
- After rendering, you can further enhance your spacejet’s appearance in post-processing software like Adobe Photoshop or GIMP. Add special effects, lens flares, or color corrections to make your spacejet look even more stunning.
11. Export and Showcase:
- Export your final 3D model as a common 3D file format (e.g., .obj, .fbx) for sharing or use in other software. Showcase your creation on 3D modeling platforms or in your portfolio.
Developing a 3D spacejet vehicle in Blender is a challenging and rewarding project. Continuous practice, experimentation, and learning are key to achieving the best results. You can find tutorials and online resources to help you master Blender’s features and techniques as you work on your spacejet design.
